
Are you looking to purchase your Spain train tickets online? By doing so, you avoid the hassle of going to a travel agency or ticket counter. You can do it at your convenience in your home or office.
You probably want to book your Renfe train tickets.
Or you may be looking to purchase train tickets from any of the other railway operators in Spain (Avlo, OUIGO, iryo).
If this is your case, don’t think twice and purchase your train tickets online using Trainline. It’s super easy to use, and you can compare all the ticket fares in one single place.
Buying Spain train tickets on the companies’ website is a nightmare
Are you having a hard time using Renfe’s website?
This website is far from being user friendly: it doesn’t have a simple interface and some sections are not even translated into English…
On top of it, Renfe’s payment platform isn’t compatible with most international debit and credit cards. So it’s very likely that you’ll get an error message every time you try to complete your purchase. This means that you need to got through the whole booking process over and over and never getting your tickets.
It’s very frustrating. I know.
You can’t imagine how many emails I get every single day asking for my help.
Fortunately, I’ve found the perfect solution for you (and for the rest of us!).
If you’re thinking to train travel in Spain, the best way to organize your trip is purchasing your tickets online through Trainline’s website. You’ll avoid the hassle of long lines at the stations’ ticket offices, and you can buy your ticket whenever you like.
This is a step by step tutorial that will guide through all the steps you need to complete to safely purchase your ticket from your computer.
Why should you use Trainline to purchase your Spain train tickets?
After years answering to hundreds of emails of travelers who couldn’t get their train tickets at Renfe’s website, I am confident to say that Trainline is the best option to purchase your Renfe train tickets.
And the same applies to Avlo’s, OUIGO’s, and iryo’s official sites. They just suck.
The reasons why I recommend you Trainline are:
- Trainline is the official reseller of Renfe and Avlo, the brands of Spain’s national railway company, OUIGO and iryo as well. So you all have ALL the options in just one place.
- Trainline sells train tickets for the same price as the Spanish carriers. No hidden booking fees added during the purchase process.
- The purchase process on Trainline is much simpler than on Renfe’s Avlo’s, OUIGO’s, and iryo’s website.
- Trainline accepts most international credit cards, and PayPal.
- You’ll always receive your tickets on time, by email and in electronic format.
How to purchase your Spain train tickets on Trainline
Here is a step by step guide to help you buy your Spain train tickets using Trainline‘s website. The interface is very friendly and the process is incredibly straightforward. But here are some indications in case you need additional help.
Step #1: Access Trainline website
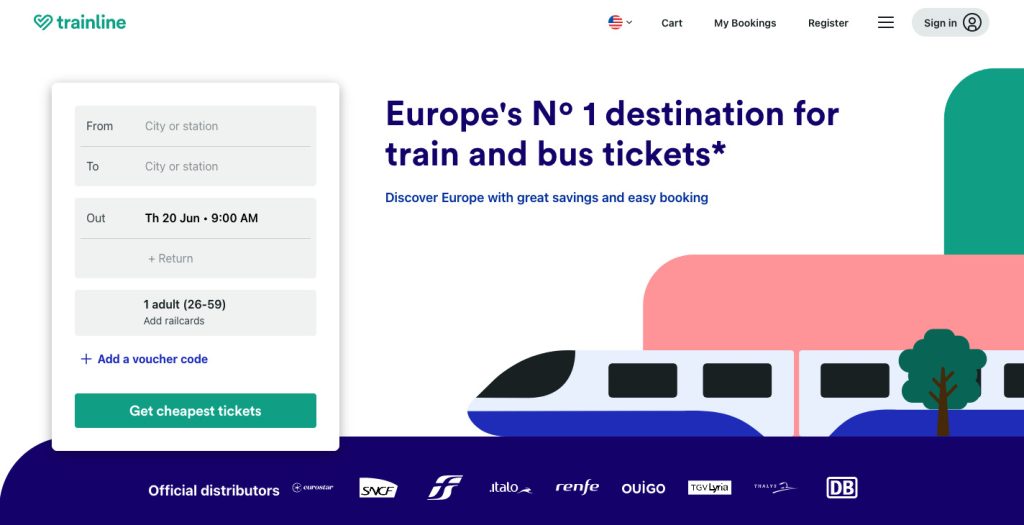
Go to www.thetrainline.com.
If the website isn’t displayed in English, choose the British flag in the menu that appears in the top bar of the site. This will only to change the site’s language so don’t worry if you’re American, Canadian, Australian…
In addition to this, you’ll see in the upper right corner that Trainline offers the possibility of displaying prices in American dollars (USD), British pounds (GBP), Canadian dollars (CAD), Australian dollars (AUD), and several other currencies.
You can be charged in your preferred currency. However, Spanish railway operators official fares are always in euros. Therefore, my suggestion is that you select to display the prices in euros (EUR) from the beginning.
At this stage, you should create an account even if you’re only going to buy one ticket. As a registered user you can log in and retrieve your booking in case:
- Your internet connection fails for any reason.
- You need to change or cancel bookings.
In addition to this, you can:
- Book a ticket from your computer and use it directly from your smartphone with the Trainline app.
- Add your fellow travellers, pre-book your tickets and keep them stored neatly in one place.
- Save your travel debit card to your Trainline account so you can pay with one click.
If you want to register click on the “Sign in” button located on the right corner of the top sidebar. On the drop-down menu, click on the “New customer? Register now” link at the bottom. Fill in all the information required and click the “Register” button.
Quit this window and return to the homepage.
Make sure that you are now logged in. If not, do so.
Step #2: Search your Spain train tickets

The left sidebar allows you to fill in a form with your trip details.
1. Fill in the “From” option box typing the city from which you are leaving.
In some cases, for cities like Madrid or Barcelona, you’ll see that more than one station option appears. To avoid any confusion, choose the city’s name without specifying the station. Don’t worry, you’ll be able to check out the departure and arrival station later on.
2. Fill in the “To” option box typing the destination city. As you did before, choose only the name of the city without specifying the station.
3. Select “One Way”, “Return”, “Open Return” or “Seasons”.
4. Set the date and time of the Out trip.
When choosing the date, different departure times will appear at the bottom of the calendar. Choose the one that suits you best from the displayed options. If you intend to make a one-way trip, the “Return” option will be blacked out. Click on the “Get times & tickets” button.
5. If you want to buy a Return ticket, set the date and time of the Return trip.
6. Click on “1 adult (26 to 59)” to determine your age and those of the people that will be traveling with you. Add as much passengers using the drop-down menu. Don’t forget to include all children, including those younger than 4 years old.
In the unlikely event that you have the Renfe loyalty card or any other special railcard, pick it from the drop-down menu.
Once you have added all the passengers that will be traveling, click on “Done”.
6. Click on the “Get times & tickets” button.
Step #3: Select your preferred fares
A new screen shows timetables and fares for your trip. Depending on your route, you can end up with a long table of results.
Moreover, if tickets are not available for the date you chose, you’ll see a message indicating that there are no tickets.
The results screen is divided into three areas.

Let’s see the information displayed on each of the areas.
1. In the upper area, you have a summary of the options you just selected: depart and arrival station, date of the trip(s) and passengers’ age.
But if you need to change anything, you can do it here and run a new search.
2. In the lower left area, you can see the search results. Trainline shows the results by highlighting with a “cheapest” tag the most interesting option for the time range you selected earlier. Your current selection time is displayed in blue. If you want to see more bus options, click on “Earlier” (at the top) or on “Later” (at the bottom).
If you are buying tickets for several people, the amount shown is the total value of all the tickets you are looking to buy. That is, if you selected 3 passengers, the value shown is the total value for all 3 passengers.
3. In the lower right area, you can see all the trip details corresponding to your current selection (highlighted in blue on the lower left area). The fare of each passenger and the specific fare conditions are displayed here as well. If you change the choice of time and train on the left side, the details displayed on the right side will change as well.
When you have determined your preferred option, click on the green “Continue” button on the right area.
Step #4: Fill in your seating preferences (optional)

In case Renfe allows you to select your seat preferences for that specific trip, tick your selection. Then, click on the green “Continue” button.
Step #5: Fill in your personal details (if you registered in step #1, skip to step #6)
In case you haven’t registered previously as I advised, the system will ask you to provide your personal and contact details.
Please DOUBLE CHECK your email address. The tickets will be sent to the address you provide and you will retrieve them there.
Confirm that everything is correct and click on the green “Continue” button.
Step #6: Confirm your Spain train tickets

On the next screen, you’ll see the information corresponding to your booking, so that you check and confirm that all the information is correct before making the payment.
Click on the green “Pay with card” button or the yellow “Pay with PayPal” button.
Step #7: Pay your Spain train tickets
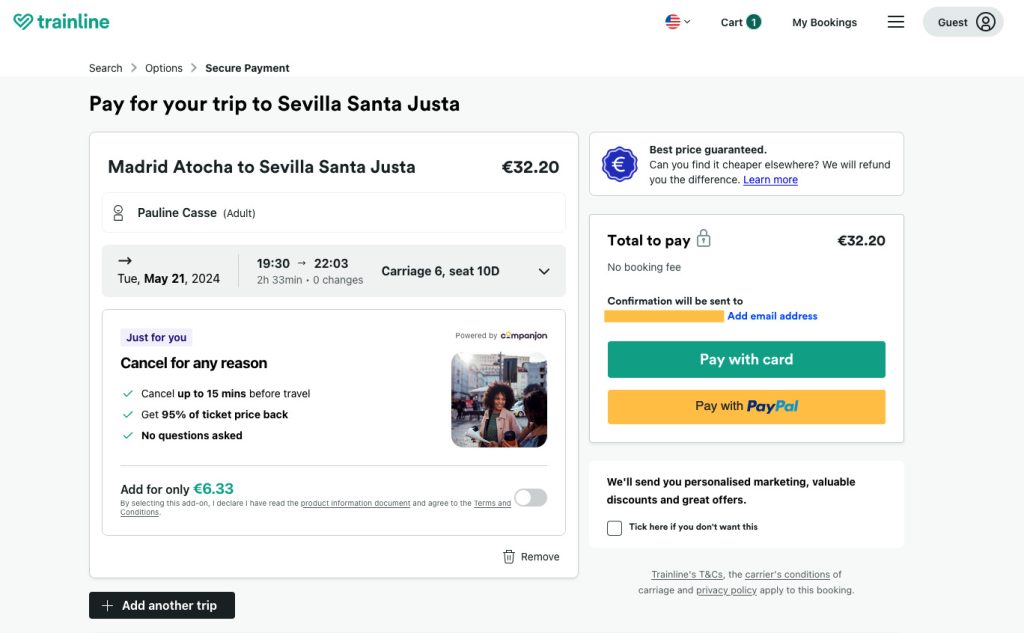
The payment procedure is pretty straightforward. You can choose to pay with your credit card, your debit card or PayPal.
Fill in the information on your credit card or choose PayPal if you want to make payment through the PayPal platform.
Step #8: Retrieve your Spain train tickets
If the purchase completes correctly, a screen confirming the transaction will appear. Soon after you should receive all the tickets in PDF format in your mailbox.
Each ticket fills up a full page. Make sure that each ticket is printed on a different sheet of paper. You’ll have to show them to the railway operator’s staff before boarding the train.
The upper part of the ticket contains all information about the trip, the lower part contains additional information and, occasionally, some advertising. Don’t cut any parts of the ticket, leave the whole sheet intact.
Alternatively, you can download Trainline‘s app and have your digital tickets on your phone.
Now you are ready to travel!
Should you purchase your Renfe train tickets at the station ticket office?
Nothing prevents you from buying Renfe train tickets directly at the ticket office of any station.
However, I don’t recommend you doing this for the following reasons:
- Some trains (particularly certain high-speed AVE trains) have a high level of occupancy. You may end up not finding any available seats on the train that fits your travel itinerary. If you are traveling around Spain during a popular holiday (e.g. Easter or Christmas), you may have to wait several hours at the station to get seats on a train.
- Last minute Renfe train ticket prices are always be much more expensive than those bought in advance. Promotional rates are the ones that run out first. In the end, Renfe train tickets availability will be limited to full fares, which are much more expensive than other fare classes previously available.
- When buying at the station ticket office, Renfe applies a service fee of 5.5% on every ticket price.
In short, buying your Renfe train tickets at the station is not a good idea. You risk not finding seats, you’ll end up paying for the full (more expensive) fare that no one wanted to buy, and on top of it you’ll be charged a 5.5% service fee on the fare.
This article is part of a complete tutorial about train travel in Spain where you can read all the information you need to organize your train journeys around the country.
Here is a complete summary of all the guide:
1. Ultimate guide on Spain trains to organize your trip
2. How to buy Spain train tickets online the easy way
3. 7 tricks to get cheap train tickets in Spain
4. Renfe: Spain’s state-owned railway company full guide
5. AVE trains: all about Renfe high-speed trains
6. Combinado Cercanías: get the most out of your free transfer
7. Is the Renfe Spain Pass worth it? My full review
8. Avlo: all about Renfe’s high speed low cost trains
9. OUIGO trains: all about the budget train operator
10. iryo: all about Spain’s low cost rail operator
11. 7 packing tips to comply with your train baggage allowance